l.a.c.
Language Acquisition Center
Saving their recordings
If your students have made a recording and you would like to save those recordings, you may do so by following these simple steps:
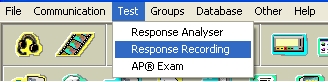
1) Go to the "Test" menu near the top and select "Response Recording"
2) In the right hand side, you'll see the "Response Recording" controls. Press the ![]() (Start) button.
(Start) button.
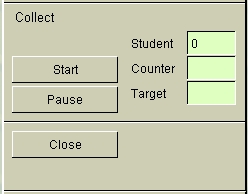
Part of the "Response Recording" control panel
3) A dialogue box will appear asking you to name your folder that will contain your sound files. In this example, I will name the folder "Sanako Test." Press the "OK" button once you've named your folder.

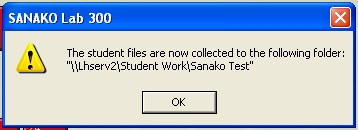
4) After pressing "OK," another dialogue box will appear confirming that Sanako has saved your folder in a predetermined drive. Press "OK" again to close the dialogue box.
5) To get back to normal Sanako operation, click on the ![]() (Close) button from within the "Response Recording" control panel.
(Close) button from within the "Response Recording" control panel.
Finding your recordings
Everytime your record something in Sanako and save it, Sanako will save the folder you named in the same location. To find your recordings, follow these steps:
1) Double click on the  (My Computer) icon located on the desktop.
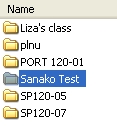
2) Locate the 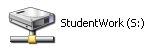 (Student Work) drive and double click it to open it.
3) Find your folder that you named earlier and double click to open it. In this example, it was "Sanako Test."
4) After double clicking on your folder that you named, you will see all the recordings you saved earlier.
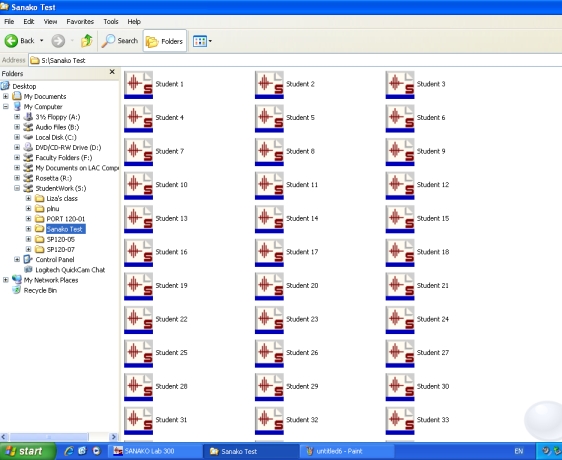
The recordings are saved according to the workstation the student was currently sitting at during the recording and saving process.